Showing posts with label Mastering. Show all posts

Cakewalk Sonar Is Back!


Cakewalk Sonar Returns: A Rebranded Powerhouse for Music Production

The wait is over—Cakewalk Sonar is back. After years of evolution under BandLab, the beloved DAW has been refreshed, rebranded, and packed with new features designed to elevate your music production experience. But before you dive in, let's break down what's changed, what's new, and whether this update is worth your time.

A Name That Resonates: Why the Rebrand?

Cakewalk by BandLab is now Cakewalk Sonar, marking a return to its roots while signaling a more focused and streamlined product line. For long-time users, the nostalgia is real, but the rebrand isn't just about sentiment—it’s about reestablishing Sonar as a premier DAW. Best of all, the new Sonar won’t overwrite your existing installation, so you can explore it risk-free.


A Fresh Look: User Interface & Customization

Sonar’s new UI refresh is sleek, modern, and more customizable than ever. With multiple themes—including the fan-favorite Tungsten—users can tailor their experience to their visual preferences. DPI Awareness is another welcome addition, ensuring high-resolution displays render crisp, clear text and graphics. No more blurry UI elements!

Pro Tip: Setting a default theme in Preferences can help maintain visual consistency across projects, reducing eye strain during long sessions.


Enhanced Workflow: Track Manager Upgrades

Efficiency is the name of the game, and Sonar’s Track Manager is stepping up. Users can now create per-project presets, toggle views more quickly, and enjoy a more intuitive layout. Whether you need a clutter-free session or custom track views for vocals, drums, or synths, the new Track Manager ensures that everything is just a click away.


XSampler: Your Built-in Sampler

No more hunting for third-party plugins for basic sampling—Sonar introduces XSampler, a built-in sampler that lets users import, tweak, and play audio as an instrument. This feature is perfect for producers looking to experiment with sound design without leaving the DAW.


Spectrum Analyzer: Precision Mixing Made Easy

Mixing engineers will appreciate the new Spectrum Analyzer, now integrated directly into the Console view, Inspector, and ProChannel. Real-time frequency analysis means better EQ decisions and faster mixing workflows.


Plugin Upgrades & Oversampling: Cleaner Sound, More Power

Plugins received some much-needed love in this update. TH-U Cakewalk Edition now delivers pro-level amp modeling, while the ProChannel Concrete Limiter ensures transparent peak control. But the real standout? Oversampling, now up to 16x. This means reduced aliasing, higher-quality processing, and overall cleaner audio.

Pro Tip: Use oversampling only when printing your mix to save CPU power during production.


Smarter Export & Backup: No More Lost Files

Sonar introduces the Cakewalk Interchange Format (CXF) for seamless project transfers across Cakewalk platforms, plus the Cakewalk ZIP format for archiving projects. These updates eliminate the common headache of missing audio files when moving sessions between systems.

Features Being Retired

Not everything made the cut in this new iteration. Here are a few notable exclusions:

  • Custom UI Themes: Legacy themes are no longer supported, meaning user-created color schemes won’t carry over.

  • ProChannel FX Chains: While FX chains remain, ProChannel-specific chains have been removed.

  • Older DX Plugins: Some DirectX plugins may not function as expected as Sonar shifts focus to modern VST formats.

  • TH3 Support Dropped: Sonar will automatically replace TH3 with TH-U, though existing TH3 presets won’t transfer.

  • No Free Version: Unlike Cakewalk by BandLab, Sonar is now a paid product, with Cakewalk Next remaining free for basic users.

Who Stands to Benefit the Most?

Singer-Songwriters: XSampler allows quick conversion of voice memos into playable instruments, making layering harmonies effortless.


Mix Engineers: The integrated Spectrum Analyzer provides visual feedback in real-time, enhancing EQ accuracy.

Live Musicians: Oversampling up to 16x ensures cleaner recordings for high-fidelity performances.

Producers with Large Sessions: Track Manager presets simplify complex projects, reducing the need for endless scrolling and manual organization.

The Verdict: Is It Worth the Upgrade?

Absolutely. With a refined UI, workflow improvements, and powerful new features, Cakewalk Sonar is a solid step forward. For existing users, the transition is seamless. For newcomers, it’s the perfect time to dive into one of the most capable DAWs on the market. Whether you're producing, mixing, or composing, Sonar has the tools to help you craft professional-quality music.

What’s your favorite update? Let us know in the comments!

The Essential Role of TOZO Noise-Canceling Headphones in Home Studios

In recent years, home studios have revolutionized the music and audio production industry, making it possible for individuals to create professional-quality work from the comfort of their homes. As technology evolves, the tools available for these home setups continue to grow in sophistication and accessibility. Among these tools, TOZO noise-canceling headphones have emerged as an essential asset for home studio owners. With their impeccable sound quality, advanced noise-cancellation technology, and affordability, TOZO headphones stand out as a must-have. This blog post will explore why TOZO noise-canceling headphones are critical for home studios and how they enhance productivity and creativity.

Why Noise-Canceling Headphones Matter in a Home Studio

Before diving into TOZO's offerings, let’s examine why noise-canceling headphones are indispensable for a home studio. Unlike professional studio environments, home studios often lack comprehensive acoustic treatment. Ambient noise from traffic, family members, pets, or neighbors can interfere with critical listening tasks such as mixing, mastering, and tracking. Noise-canceling headphones mitigate these distractions, providing a focused listening environment and enabling you to hear every detail of your audio.

Noise-canceling headphones are particularly useful during mixing and mastering sessions, where precision is paramount. Subtle frequencies and intricate soundstage details can make or break a mix. Without proper isolation, these nuances might be missed, resulting in subpar audio quality. High-quality noise-canceling headphones ensure that external noise doesn’t compromise your ability to make informed sonic decisions.

Key Features of TOZO Noise-Canceling Headphones

TOZO headphones have earned a reputation for delivering top-tier performance at an accessible price point. Here are the standout features that make them ideal for home studio use:

1. Advanced Noise-Cancellation Technology

TOZO headphones use hybrid active noise-canceling (ANC) technology, combining feedforward and feedback microphones to cancel out a wide range of external noises. This ensures a quiet and immersive listening experience, even in noisy environments. Whether you’re editing a podcast or mixing a song, the ANC feature allows you to focus solely on your audio.

2. Exceptional Sound Quality

One of the most critical aspects of studio headphones is sound accuracy. TOZO headphones are engineered with high-resolution audio drivers that deliver a balanced frequency response. The bass is tight and controlled, the mids are clear, and the highs are detailed without being harsh. This neutral sound profile ensures you’re hearing your audio as it truly is, enabling accurate mixing and mastering decisions.

3. Comfortable Design for Long Sessions

Home studio sessions often stretch for hours, making comfort a top priority. TOZO headphones feature ergonomic designs with plush ear cushions and adjustable headbands to ensure a snug fit. Their lightweight build reduces fatigue, allowing you to work on your projects for extended periods without discomfort.

4. Wireless and Wired Options

Flexibility is another area where TOZO excels. Their headphones offer both wireless and wired modes, catering to different use cases. The Bluetooth connectivity is reliable, with low latency, making it suitable for casual listening or referencing. For critical listening tasks, the wired mode ensures an uncompressed audio signal, preserving the integrity of your work.

5. Long Battery Life

For those who prefer wireless functionality, TOZO headphones provide impressive battery life. Depending on the model, you can expect up to 30 hours of continuous playback on a single charge. This ensures that you won’t be interrupted during long sessions.

6. Affordability

TOZO headphones offer professional-grade features at a fraction of the cost of high-end studio headphones. This makes them accessible to home studio owners working within tight budgets, without sacrificing quality.

How TOZO Headphones Enhance Home Studio Workflows

TOZO headphones are more than just an accessory; they’re a tool that can significantly improve your home studio workflow. Here’s how:

1. Precision in Mixing and Mastering

The accurate sound reproduction of TOZO headphones ensures that you can identify issues in your mix, such as frequency imbalances or phase problems. This precision allows you to make adjustments that translate well across different playback systems, from car speakers to high-end audio systems.

2. Isolation During Tracking

When recording vocals or instruments, bleed from playback monitors can be a problem. TOZO’s noise-canceling headphones provide isolation, ensuring that the backing track doesn’t interfere with the recording. This results in cleaner takes and less time spent on editing.

3. Focus and Productivity

Distractions can derail your creative process. With TOZO’s noise-cancellation, you can block out the outside world and immerse yourself in your work. This focused environment fosters creativity and productivity, allowing you to achieve more in less time.

4. Versatility Across Applications

TOZO headphones aren’t limited to music production. They’re equally effective for podcast editing, video production, and general listening. Their versatility makes them a valuable addition to any home studio.

TOZO Models Recommended for Home Studios

TOZO offers several models of noise-canceling headphones, each with features tailored to different needs. Here are some models highly recommended for home studio use:

TOZO NC7

The NC7 is a flagship model with state-of-the-art ANC technology and a 40mm dynamic driver for superior sound quality. Its foldable design and extended battery life make it a practical choice for home studio users.

TOZO NC9

The NC9 takes things a step further with an upgraded noise-cancellation chip and transparency mode. This feature allows you to hear ambient sounds when needed, adding convenience during collaborative sessions.

TOZO NC2

For budget-conscious users, the NC2 offers excellent performance at an affordable price. It features hybrid ANC, balanced sound, and a comfortable design, making it a solid choice for home studios.

Tips for Getting the Most Out of Your TOZO Headphones

To maximize the potential of your TOZO noise-canceling headphones, consider the following tips:

  1. Optimize Fit: Ensure the ear cups create a proper seal around your ears to enhance noise cancellation and bass response.

  2. Use Wired Mode for Mixing: When working on critical tasks like mixing and mastering, use the wired mode to eliminate latency and preserve audio fidelity.

  3. Maintain Battery Health: For wireless models, avoid overcharging to prolong battery life.

  4. Pair With Acoustic Treatment: While TOZO headphones are excellent for isolating sound, combining them with basic acoustic treatment in your home studio can further improve your listening environment.

  5. Clean Regularly: Keep your headphones clean to maintain their comfort and longevity. Use a soft cloth to wipe down the ear cups and headband.

Conclusion

TOZO noise-canceling headphones are a game-changer for home studio owners. They combine advanced technology, exceptional sound quality, and user-friendly design at an affordable price point, making professional-grade audio production accessible to everyone. Whether you’re a seasoned producer or just starting your journey, investing in a pair of TOZO headphones can elevate your home studio experience and help you achieve your creative goals.

With their versatility, precision, and affordability, TOZO noise-canceling headphones are not just a tool but an essential companion in the modern home studio. Don’t let external distractions or subpar equipment hold you back—step up your audio game with TOZO, and bring your creative vision to life.


Cakewalk by BandLab Tutorials


How much does Cakewalk cost? Is Cakewalk really free? 

Yes.Cakewalk by BandLab, once Sonar, is now FREE. Usually a FREE digital audio workstation (DAW) would be limited. Not this one! Whether it's beatmaking, recording, mixing, mastering, or anything in between, this is the most powerful full featured DAW on the market. 

 Is Cakewalk good for beginners?

In short, yes. Although my thought process is that the DAW is only a tool. If you're starting out it would be beneficial to start out with a DAW that can grow with you as you get better. Cakewalk is easy enough to learn quickly with a little help (see playlist provided) and yet robust enough to perform on par with any other DAW on the market.

Is Cakewalk different from BandLab?

 Yes. Essentially there is an online version and a desktop version. Each has there own strengths and weaknesses apart from each other, but also work well together. While the online version is more loop based and shareable right after conception. The desktop version is more robust and has more to offer the singer/songwriter or recording engineer.

Honestly, you have nothing to lose by trying Cakewalk as it is completely free and safe. If you're interested in trying it out this playlist will get you up and running quickly and feeling comfortable with the program. Enjoy!

A Better Mix: Simple Steps (Part 2)

In the previous post I included a video about the process and the concepts I used to dramatically improve my mix on the song "Livin' For The Moment". In the video attached to this post I go step by step explaining the concepts. I hope you enjoy this sort of over the shoulder approach. To hear the podcast associated with this post click here. http://bit.ly/HSS_Podcast

New Mixing Headphones

If you have been following me on my Home Studio journey, you know that I am an advocate of Mixing on headphones. Though many say it is impossible, if done with the right goals in mind it can be very rewarding and enjoyable. Recently, I bought me a set of semi-open backed headphones for just such a task. I wanted to let you know what I thought of them so that if you were thinking of buying a pair you could get an unbiased opinion.

The headphones in question are the AKG K 240 Semi-Open Studio Headphones. Now, upon first glance I thought "these things look cheap". However, their appearance and build are another thing all together. Though they do have a "cheapesh" look to them (yeah I made that word up), their build is pretty solid. They are very light weight and above all else... They sound amazing! No, not amazing like an average listener would find amazing. (Smiley face EQ curve, overly bassy, sparkly) On the contrary these are very reference like. I mixed a song on them in 30 minutes and it translated well! I went back and checked the same mix on my M-Audio BX5a's and there were only a few adjustments that needed to be made! This was a win for me! I picked these up at a great price and you can to, click the picture or the link above and get a great deal while also helping out a fellow engineer at no extra cost to you. Have an awesome day!

Mobile Mix Reference

If you are anything like me, (I will pray for you if you are) then you probably take your mixes with you due to time constraints. You wanna hear it in the car, you wanna check it on that Bluetooth stereo your buddy has, and so you put the printed mix (your latest revision) on your mobile device and take it with you.

I use my iPhone a lot! I even utilize the features that it has installed to help me make educated decisions when I get back to the studio. Let me explain that last statement in detail. There are features in the iPhone that aren't so well known that can help you out as a mixing engineer.

The first is the mono setting for your music. If you were unable to check for phase or proper EQ adjustments before you left, or maybe even forgot, this setting can really help out. However, it is kind of hidden in all the various menus, menus that most will never even go through. To utilize this setting as a mixing reference tool follow the instructions below

1) Click on the Settings button


2) Next click on the General option


3) Now click on the Accessibility menu
4) Scroll to the bottom now and you will see the Mono option


I recently just used this on a mix that I was in a hurry to get on the phone. I had not checked the phase, or even to mix itself in mono as of yet and was still in the "rough draft". I could hear the guitars in the headphones, but in the car they were gone. So I switched my phone to Mono and the guitars disappeared in the headphones! Immediately I knew the Phase was out on the guitars. Pretty cool that I was able to make that finding while at work and away from the mixing desk.
The next menu is a little more accessible and isn't as buried in a maze of other menus. I was surprised however by the number of people that did not know this menu existed. I am speaking of the EQ menu found under the Music app. To find that menu follow the instructions below.

 
1) Click on the Settings button


2) Scroll down to the Music menu
3) Scroll down to the bottom to find the EQ menu

4) Choose from a wide variety of EQ options

Ok, so now that we have found the EQ menu, we can use this to gain insight as to where our mix may be lacking or overdone. For instance, if you can only handle the Bass in your mix on the Bass Reducer setting, chances are you need to make some adjustments to your low end. Now, all this is subjective to the headphones you may be listening on as well.

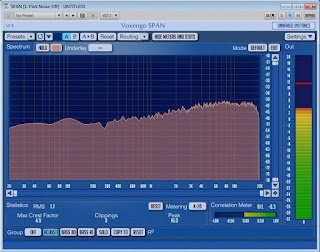
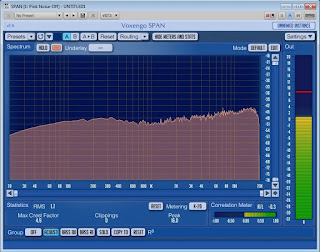
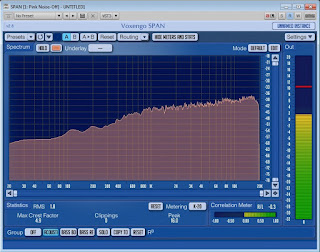
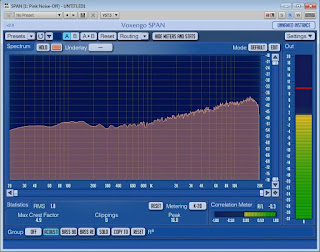
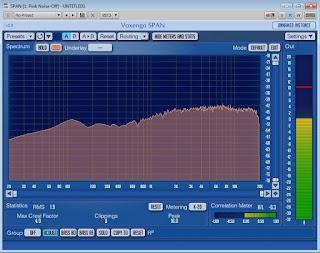
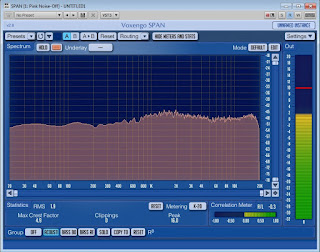
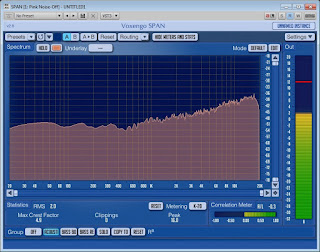
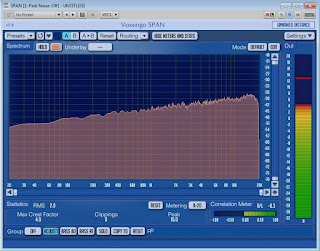
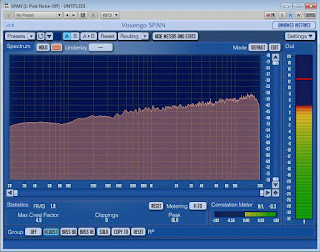
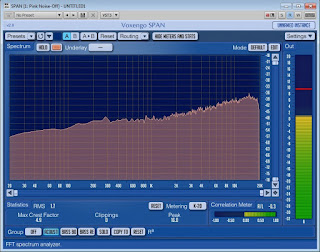
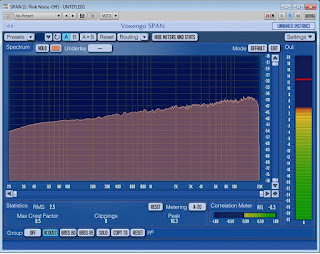
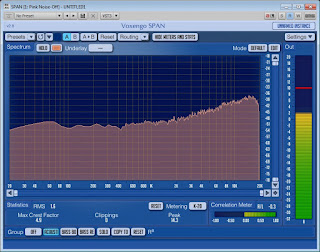
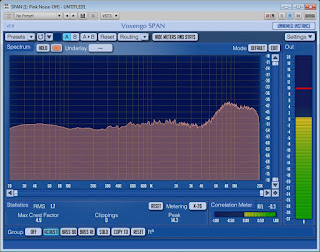
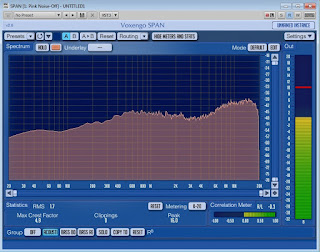
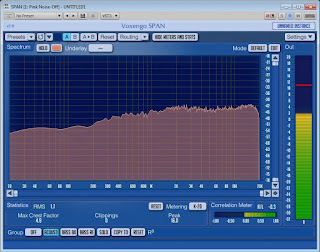
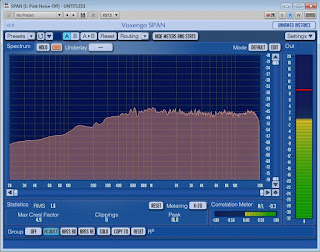
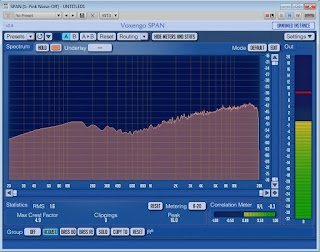
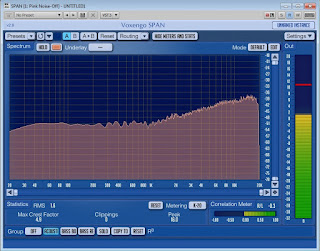
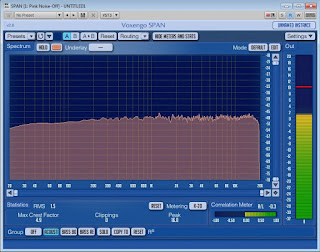
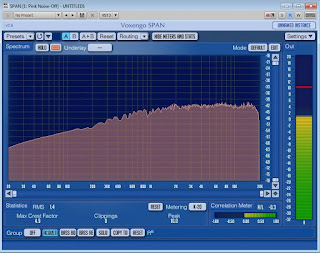
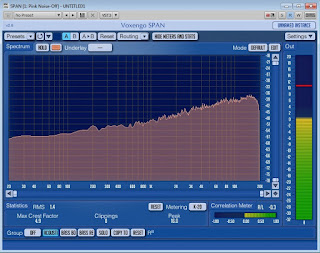
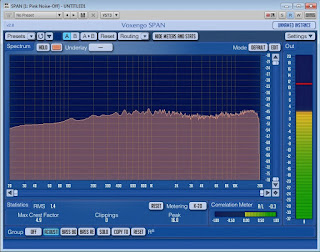
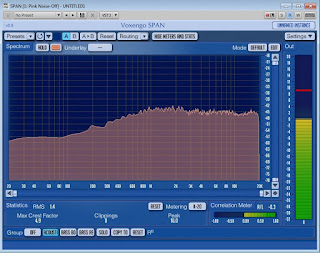
I did a lot of research and even went as far as to get on the Apple website to find what exactly the EQ settings change in the frequency ranges. After a tiring search I turned up nothing. So, in the spirit of my Scottish heritage, I improvised. I downloaded a pink noise signal which is one of the flattest sound profiles you can get. I played it through my iPhone while the headphone jack was plugged into the microphone jack on my PC. Then I put the SPAN plug in on a track and therefore was able to view the EQ changes that were taking place by changing the settings in the iPhone. Below you will find screenshots of the various settings with labels to attribute. This information is no where else! 

Acoustic Setting
Bass Booster Setting


Bass Reducer Setting
Classical Setting
Dance Setting
Deep Setting
Electronic Setting
Flat Setting
Hip-Hop Setting
Jazz Setting
Late Night Setting
Latin Setting
Loudness Setting
Lounge Setting
Piano Setting
Pop Setting
R & B Setting
Rock Setting
Small Speakers Setting
Spoken Word Setting
Treble Booster Setting
Treble Reducer Setting
Vocal Booster Setting
Now, one thing to remember is that your car already has an EQ in place, so you need to set your EQ on your iPhone to off before listening in the car, otherwise it will sound all jacked up. I hope this was helpful, if nothing else it is at least interesting. If you would like a copy of the jpegs associated with the EQ settings (the same ones found above) you can download it here.


What is Phase? How do you handle it?

In this video I talk a little about what Phase is, and some simple ways to check for it. I also explain a real simple way to fix it on an acoustic guitar that has been recorded DI and mic'd simultaneously. This is by no means the definitive guide on Phase, and only covers a small area, but there are several sources out there that go so far in depth that they lose the element of simple. I like simple. Simple solutions, simple answers, and simple explanations, so I have left it as simple as I can for now. I may go more in depth later if the need arises but for now I hope this is helpful.


Note:

A number of instruments are routinely recorded both acoustically and electrically, simultaneously. For example, electric bass is often recorded via both a DI box and a miked amp, while an acoustic guitar's piezo pickup system might be recorded alongside the signal from a condenser mic placed in front of the instrument, in some situations. In such cases, the waveform of the DI or pickup recording will precede the miked signal because of the time it takes for sound to travel from the cabinet speaker or instrument to the mic. The resultant phase cancellation can easily wreck the recording.
A quick fix for this is to invert the polarity of one of the signals, and see if this provides a more usable tone. It's almost as easy to tweak the miking distance for more options if neither polarity setting works out. A better method, though, is to re-align the two signals in some way by delaying the DI or pickup channel, either using an effect unit during recording, or by shifting one of the recorded tracks after the fact using your sequencer's audio-editing tools.

Hope this helps.

Check That Mix

So you're mixing for awhile and all of the sudden this gut wrenching feeling comes on you... "Am I even helping this mix?" You start question your next move, you start doubting all the work that you've done and then you think to yourself "Maybe I should just scrap this mix and start over".

Well, DON'T! Not yet anyway. There are times where I have had to do just that and it's not cool. So, before you ruin all your hard work, try this little trick first!


HSS Screencast 006-Adding "Glue" to A Mix

In this screencast I give you a quick tip to add some "glue" to a mix. This is not for every mix, but can be useful at times.


Cutting Through The EQ Myths

One of the Mixing Engineers best friends is the trusty EQ. It is one of those mysterious elements that can't immediately be heard, whether it is right or wrong, that is unless it is horribly wrong, or incredibly right. It also is one of the areas of Mixing that requires the most patience and training. However, there are a lot of myths surrounding EQ that I would like to dispel.

Myth #1

EQ Can Fix Anything

This is an obvious lie. Yet, so many individuals have this mindset at first. The fact is a bad recording cannot be EQ'd into perfection, and there are times when we just have ti cut our losses and re-record that take. I will never forget the time I spent a week on one mix trying to get the Bass to set in it properly. After many late nights of me banging my head off the desk, and pretty much wanting to throw my computer out a window, the thought hit me.... "Maybe I should just re-record the Bass?"
One take later, I mean literally 5 minutes later, and I had a Bass track that set perfectly in the mix!


Myth #2

You Can Add Bass Later

I have been on a Bass kick here lately, and so here I go again. My recent post was spun to help tame that beast, and this portion of the article is to make sure that beast is still in the cage at all. Thinking that you can add Bass back into a track after you have recorded it is another fallacy. Once a track, especially a Bass track, has been recorded you cannot add anything back into it (using EQ) that you have cut out before the recorded finale. So many have tried, in futility, to add Bass back into a track that they have already removed. You cannot boost or even cut anything that isn't there.


Myth #3

All EQ's Are The Same

If this were the case, why would there be so many? The fact is there are no two alike! Every EQ regardless of its designer has some sonic difference from another. Through trial and error you can pinpoint which one really works for you. The differences in most EQ processors, whether they be outboard gear or plug-ins, are not incredibly noticeable to the untrained ear, but all of them do boost and cut differently for sure. One of the biggest differences is that each one has a different interface and some contain extra elements that others do not. (i.e. frequency spectrum analyzers, limiters, etc.)

Myth #4

You Have To EQ Every Track

When I first started recording, this was my thought. Then I had this revelation one day while recording an acoustic guitar. I went to place it in the mix, going through the usual measures, when I noticed that it fit perfectly. It fit perfectly! No EQ, no compression, no clever mixing tricks, just an amazing recording! Now, I can't say that I didn't still take the preventative approach, (HPF @ 80 hz) but I didn't have to do anything else to it!

This is the EQ I use and love, it is the Sonitus:Equalizer. it's a part of the Sonar x3 DAW.

I am sure there are more myths that could be disproved. Can you think of something you'd like to add? What is your favorite EQ? Send me an email or comment below. Have a blessed day!

Taming The Bass Beast

The bass! That Crazy bass! It seems to be the one element that is hardest to tame, and even harder to set properly in the mix. Yeah, it's there... and yes you can hear it, but if not mixed right it can quickly over power everything and cause your levels to peak on the master bus. This in turn causes the dreaded "clipping".
Clipping in the analog realm was not such a bad thing. In fact many an engineer used it, and are still using it beneficially. Clipping in the digital realm is a whole new story though. Nasty! Just nasty!

Luckily there are ways to take care of these issues. As with most recording tips, these are purely subjective. But as one who has tamed this beast on several occasions, I will share with you what has worked for me.
First things first though, it must be made known that every mix is different and there are no X,Y, & Z solutions. These tips will merely give you another ace up your sleeve, a proverbial trick in the bag, a... Well, you get the point.

High Pass Filters are Your Friend

Ok, so in order to tame this beast you must first know where it lives. The human ear can only hear so far down on the hertz spectrum, and once you get to a certain point you simply "feel" those low notes. Though debatable, 20hz is considered to be the lowest frequency a person can hear. (Debatable because super heroes are real) Therefore one could deduce that anything below that is useless and can be extracted via the trusty high pass filter. Now, while we are on that subject, in would behoove you to throw that HPF on every track in the mix and remove any low end content that is not needed. (i.e. 100hz HPF on Vocals, 37hz on Bass, etc.) This will eliminate a cumulative bass build up over the course of several tracks. Now, you can't remove all you low end, otherwise you will be left without punch and feel, but if done right you will already have a good starting point to taming the beast.

Wooly Mammoths are Extinct

There is an area of the bass guitar that just doesn't sound right. It varies, but usually it is around 500hz. This is an area that is regularly described as sounding "wooly", or muffled. With some gentle EQ'ing one can remove the blanket off the speakers. I like to use a wide cut of about -1 or -2dbs at a Q of -0.5 to -1.0 in the 450-500hz range to remove those "hairy" sounds.

You Gotta Keep Em' Separated

Your humming that right now... Sorry. But seriously, another way to keep all that build up from, well building up, is to use your Pan pots to separate other instruments that are bass heavy. This will leave that center area that the Bass plays well in, less cluttered with other low overtones. (Note: I don't recommend panning out though until you get a decent sounding EQ in mono)

3 Heads are Better than 1?


Another way I have got a great Bass sound in a less populated mix, is to create 2 busses just for my Bass. (Hold on now! Don't crucify me yet) I know, here I am talking about taming the beast, and now I am saying make it a 3 headed Hydra. Give me a minute here though! So here's how it would look. You have your main Bass track right, now create 2 sends that go to 2 separate Busses. Each bus will have the same settings but one will be panned hard right and the other hard left. Now, with your favorite EQ, take away all the low end from those bus channels and throw some saturation/distortion on them. Start with your faders all the way down and blend in the two side channels, just enough to gain a little extra clarity. Though this does not work on every mix, it is yet again another option.

Hawaiian Punch!

Now, you want a punchy Bass do ya? Yeah, we all do at times. This can be easiest to achieve from carefully selected compression and even some multi-banding.

These are just a few tips to get you there. If you'd like to see some of this in action, sign up for the email newsletter. My subscribers receive FREE stuff in there inbox from time to time, stuff that really matters! I don't spam! And I only send out product reminders monthly, or before they are released, to share with my buddies.


Have a blessed day, and I will talk to you... Later.

5 Tips Every Mixing Engineer Should Know

While it's true that there are no hard and fast rules when it comes to mixing, there are some common grounds that nearly every engineer can meet on. Though this list could be exhaustive, I have tried to narrow it down to just five. (I don't know why I like five so much) Ok, so here we go!

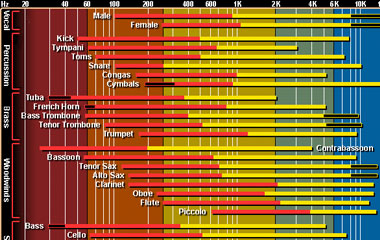
1) EQ- Most any engineer will agree that a narrow cut, as well as a wide boost, will sound the most natural. Although, every engineer has a different taste when it comes to the mix as a whole. (I.e. Some mix "darker" than others) A great tool I have used is the interactive frequency chart found here: EQ Chart


2) Room Trearment- Though the brand, amount needed, and such, is a topic of debate, the one thing everyone can agree on is that you at least need something. Whether you are mixing R&B, Rap, Rock, Pop, etc., you still will need some kind of treatment for your room. There are many options to choose from and really it depends on what you are working with, but there are definitive ways to know what you need, and where to put it. One such resource that I have used is the Room EQ Wizard. It is free and there are extensive tutorials on YouTube. Another great tip is the "Mirror trick", which will help you to pinpoint your areas of early reflection. You also need a good balance of treatment when it comes to treating for frequencies. Tom much can kill a rooms natural sound, and not enough can play tricks on your ears. There must be a yin and yang of bass treatment as well as mid and high frequencies as well. Click the picture below for some great deals on name brand acoustic foam. You can also check out this cheaper alternative Foam By Mail. They offer cheap acoustic open cell foam for a fraction of the cost!

3) Mixing Desk Placement- Yet again, this is a tip that is generally know by all, but for those who may not know, it really matters where you place your desk in the studio. The rule of thumb is to place your desk along the longest wall in the studio so as to minimize EQ anomalies. But for some of us, myself included, that is simply not an option. My plug ins will not allow me to put my desk where I want it, so now what? Well, that will be covered in the next tip!


4) Mixing Levels- Did you know that there is a sweet spot for mixing levels in terms of loudness? Yep, even some of the "greatest" engineers have stated that the ideal listening level is close to 85dbs! Or, another way to know how loud is to loud, is to get your listening levels to the point where you can still have a normal conversation with someone in the same room and not have to yell at them. Think I am making this up?! Here is the same thing I just said from Chris Lord-Alge, I think he's famous or something. So, as stated above, if your desk is not in the prime position in the room  by simply listening to your mix at lower levels you can drastically improve your EQ decisions. This also helps to combat a lot of the issues of a room that's either not treated at all, or treated very poorly.Then of course there is always the option to mix on headphones! Yes, I said that! Believe it or not there are quite a few industry leaders with some clout that are promoting this idea as well! I am sure you've heard of FocusRite?! They actually developed a VRM headphone monitoring system which emulates the sounds of several famous reference monitors wihtin your headphones! Pretty cool!


5) Get It Right At The Source- One of the best ways to get great mixes is to record great sounding takes. The cliche of "Fix it in the Mix" is a fallacy! You cannot polish a turd, and you can't fix some things no matter how good you are! This has been shouted from the rooftops and yet still people are trying to take average recordings and turn them into polished Masters. The reason why the "big studio" guys can get such great sounding mixes and masters is because their tracks were recorded well. It really comes down to about 20% gear, 20% engineer, and 60% captured sounds. My mixing mentors have told me time and time again to get it right at the source before you do anything else! Also, just take a moment to watch some Pensado's Place and just listen to the tracks he is working with. It will open your eyes, and your ears to a whole new world of thought.