Showing posts with label Tips and tricks. Show all posts

How I Built The Perfect Pedalboard | Start to Finish

What if I told you that building the perfect pedalboard isn’t just about pedals and power supplies, but about perseverance and persistence?

A little over a year ago, I embarked on a journey to create the ultimate pedalboard—a journey filled with surprises, setbacks, and problem-solving. What I thought would be a straightforward build quickly turned into a challenge, testing my patience and creativity at every turn.

In this post, I’m going to condense that year-long quest into a step-by-step guide. Whether you're building your first pedalboard or looking to upgrade your current setup, you’ll likely encounter some of the same challenges I did. Hopefully, my experience can save you time, money, and frustration along the way. Let’s dive in.


The Vision and the Challenge

When I set out to build my pedalboard, I had a few key goals:

  • Sparkly clean tones

  • Textured, wide ambient swells

  • Maximum creativity

  • Versatility to cover a wide variety of sounds

Sounds simple, right? Well, I quickly realized this wasn’t a plug-and-play project. After testing various pedals and board configurations, I finally landed on a setup that would give me the most tonal flexibility without compromising audio quality.

Once I had a general idea of my pedal choices, the next challenge was finding the right board. I needed something affordable, durable, and capable of clean cable management. Thankfully, I discovered the Rockboard Board Configurator, an online tool that allowed me to visualize my layout and anticipate potential snags. It helped me determine:

  • What size board I needed

  • What kind of power supply to use

  • Minimum cable lengths for my setup

Using this tool was a game-changer, but as I’d soon find out, nothing is perfect on paper.


Pedal Selection and Signal Flow

Here’s the lineup I decided on, in order of signal flow:

  1. Behringer FC600 Volume/Expression Pedal – A heavy-duty volume pedal with an expression function and a side input for a tuner.

  2. Rockstock Nano Tuner – A compact yet highly visible tuner, hooked up via the volume pedal’s side input.

  3. Donner EQ Seeker – A 7-band graphic EQ, perfect for shaping tone and boosting signal.

  4. Wampler Ego 76 Compressor – A high-quality compressor with blend control for natural dynamics.

  5. JET Pedals Unity 6 Looper/Switcher – The brain of my board, featuring a touchscreen, MIDI control, and six rearrangeable analog loops.

  6. Caline Pure Sky Overdrive – A transparent overdrive pedal that enhances natural amp tone.

  7. Lamb Overdrive – A versatile overdrive with warm, tube-like characteristics.

  8. ARP-87 Delay – A multi-mode delay pedal with tap tempo and modulation control.

  9. Tonex Amp Modeler – My virtual amp and pedal modeler with 150 tone captures and stereo outputs.

  10. X-Space Reverb – A high-quality stereo reverb with 16 algorithms and MIDI connectivity.

  11. Slöer Ambient Reverb – A dreamy reverb with multiple modes and infinite sustain capability.

Finally, my stereo outs travel to the Rockboard MOD 3 patchbay, keeping everything clean and organized.


The Setbacks Begin

Problem #1: Space Constraints

My dream setup was just a bit too ambitious for the board I ordered. While the online tool helped, I didn’t account for the difference in cable sizes—some of my non-Rockboard cables took up more room than expected. This led to a tough decision: something had to go.

Instead of removing pedals, I got creative. The EQ and compressor are “always on” pedals, so I decided to mount the EQ under the board to save space. Problem solved… or so I thought.

Problem #2: A Pedal That Wouldn’t Auto-Power On

I quickly realized that my EQ pedal wouldn’t turn on automatically when power was supplied. If I mounted it under the board, I’d have to flip everything over to press the power button—not ideal. After some research, I discovered a solution: modding the pedal.

Using a multimeter, I found the switch contacts that controlled power. I soldered a jumper wire to bypass the manual switch. At first, it worked—but then the pedal’s microcontroller reset the bridge after power loss. After more troubleshooting, I found another bypass method using a 1k transistor, finally getting the pedal to stay on when powered. Victory!


Overcoming Power and Cable Management Challenges

To ensure everything powered up smoothly, I used an isolated power supply with inline adapters for tricky pedals. Proper cable management was also crucial. I secured everything with Velcro and zip ties, keeping the underside clean and minimizing interference.

The biggest breakthrough came when I rearranged my signal flow. Placing the EQ up front gave me better tonal control, while keeping delay and reverb last ensured clarity.


The Final Assembly and Testing

After hours of mounting, wiring, and adjusting, it was time for the moment of truth. I plugged in the power supply, flipped the switch, and watched as each pedal lit up one by one. Everything powered on correctly, signal flow was clean, and—most importantly—the board sounded incredible.


Final Thoughts

Building a pedalboard isn’t just about choosing the right gear. It’s about problem-solving, creativity, and the satisfaction of crafting something that’s uniquely yours. If you’re planning your own build, here are some takeaways from my experience:

  • Plan ahead – Use online tools to map out your layout before purchasing.

  • Test fit everything – A “dry fit” before securing pedals can save headaches.

  • Expect the unexpected – Issues will arise, but creative solutions exist.

  • Invest in good cable management – A clean setup is easier to troubleshoot and maintain.

Have you faced any challenges while building your pedalboard? Let’s discuss in the comments!


Building The Ultimate Pedalboard | Guitarist Edition

For guitarists of all levels, pedals can unlock new sonic possibilities, turning a simple guitar riff into a masterpiece of tone and texture. However, diving into the world of guitar pedals and pedalboards can be overwhelming without a clear understanding of what’s essential, what’s optional, and how to bring it all together. This article answers some of the most common questions about guitar pedals and setups, helping you navigate this often complex but rewarding world. 

*Clicking the blue words will take you to suggested products


What Is the Typical Guitar Pedal Setup?

The term "typical" guitar pedal setup can vary based on the genre, player preference, and intended use. However, most setups follow a logical signal chain that ensures each pedal performs at its best. Below is a general order for arranging pedals:

  1. Tuner
    The tuner pedal should always come first in the chain to receive the cleanest signal from the guitar. This placement ensures accurate tuning without interference from other effects.

  2. Dynamic Effects (Compressors, Wah, Volume)
    Next in line are pedals that affect dynamics or tone shaping, like compressors or wah pedals. Compression helps even out the volume of your playing, while wah pedals add a sweepable EQ effect.

  3. Overdrive, Distortion, and Fuzz
    Gain-based pedals such as overdrive, distortion, and fuzz come after dynamics. They amplify and clip the signal, creating those iconic dirty tones.

  4. Modulation Effects (Chorus, Flanger, Phaser)
    Modulation pedals add depth and movement to your tone. These effects are best placed after gain pedals to process the already-shaped signal.

  5. Time-Based Effects (Delay, Reverb)
    Delay and reverb pedals typically go at the end of the chain. They create ambient textures and echoes that sound best when applied to the fully processed signal.

  6. Loopers
    Loopers should usually go at the very end of the chain. This placement allows you to capture and layer the entire processed signal, including all effects.

While this order is a standard starting point, experimentation is encouraged. Some players prefer placing modulation effects before overdrive for a unique sound, or they might add multiple overdrive pedals to stack gain stages.


Do You Need a Pedalboard for Guitar Pedals?

The short answer: No, you don’t need a pedalboard, but you probably should have one.

If you only use one or two pedals occasionally, you can get by without a pedalboard. However, as you add more pedals to your collection, a pedalboard becomes essential for several reasons:

  1. Organization
    A pedalboard keeps your pedals in a consistent, logical arrangement. This organization is especially important for live performances, where quick adjustments may be needed.

  2. Cable Management
    A pedalboard helps reduce cable clutter by neatly routing power and patch cables, reducing the risk of signal loss or noise interference.

  3. Transportability
    A pedalboard makes it easier to transport your pedals between practice sessions, gigs, or studios. Most pedalboards come with a carry case for added convenience.

  4. Durability
    Pedalboards protect your pedals from wear and tear, especially during transport. Many boards have a durable frame and secure mounting options to keep pedals in place.

Without a pedalboard, you're likely to face challenges like tangled cables, inconsistent setups, and increased setup time. There are a ton of options out there but here is my personal favorite here!


How to Choose a Guitar Pedalboard

Selecting the right pedalboard depends on several factors, including the number of pedals you own, the space you have, and your specific needs as a guitarist. Here’s a step-by-step guide to help you choose:

1. Determine Your Pedal Count
Small Setup (1–5 pedals): A compact pedalboard like the Pedaltrain Nano is ideal.
Medium Setup (6–10 pedals): Look for a mid-sized board such as the Pedaltrain Classic 2.
Large Setup (11+ pedals): Opt for a large board like the Temple Audio Trio or Pedaltrain Pro.

2. Consider Power Requirements
Each pedal requires power, so you’ll need a power supply that can handle your setup. Look for pedalboards with integrated power supplies or space to mount one underneath.

3. Plan for Future Expansion
Even if your current setup is small, you might add pedals in the future. Choose a pedalboard with enough room to accommodate growth.

4. Evaluate Portability
If you frequently travel or gig, prioritize lightweight, portable boards. Consider a board with a hard or soft carrying case for added convenience.

5. Assess Build Quality
Ensure the pedalboard is made of sturdy materials, such as aluminum or steel, to withstand regular use.

6. Cable Management
Some pedalboards have built-in cable management systems, which can simplify setup and reduce noise.

7. Aesthetics and Customization
Some pedalboards, like those from Temple Audio, allow you to customize the layout and color. While not essential, aesthetics can make your rig more enjoyable to use.


What Pedal Should Every Guitarist Have?

While every guitarist’s needs differ, some pedals are universally useful. Here are a few that most players consider essential:

A reliable tuner is non-negotiable. The Boss TU-3 or TC Electronic PolyTune are industry standards.

Overdrive is one of the most versatile effects, ranging from subtle warmth to full-blown crunch. Popular options include the Ibanez Tube Screamer and the Fulltone OCD.

A delay pedal adds depth and rhythmic complexity to your playing. The MXR Carbon Copy and Boss DD-8 are excellent choices.

Reverb enhances the natural space in your tone. Pedals like the Electro-Harmonix Holy Grail or the Strymon BigSky are highly regarded.

Compressors like the Keeley Compressor Plus can smooth out your playing dynamics and add sustain, making them invaluable for clean tones and solos.

For heavier genres, a distortion or fuzz pedal is a must. Try the Pro Co Rat for distortion or the Electro-Harmonix Big Muff for fuzz.

Modulation effects like chorus, phaser, and flanger add movement to your sound. The Boss CE-2W or MXR Phase 90 are excellent starting points.

A volume pedal gives you dynamic control over your signal, useful for swells and gradual fades.
 

Putting It All Together

Building the perfect pedal setup takes time, experimentation, and a clear understanding of your musical goals. Here's how to get started:

  1. Start Small
    Focus on essential pedals before expanding your collection. For most players, a tuner, overdrive, delay, and reverb are a solid starting point.

  2. Experiment with Placement
    While the standard pedal order is a good guideline, experiment with different arrangements to find what works best for your style.

  3. Invest in Quality Cables
    High-quality patch cables and power supplies can make a big difference in tone and reliability.

  4. Maintain Your Pedals
    Keep your pedals clean and check for loose connections regularly to ensure they perform at their best.

  5. Upgrade Gradually
    As your skills and needs grow, invest in higher-quality pedals and accessories.

For a stress-free way to know exactly what you need for your pedalboard build I suggest using the RockBoard "Board Configurator! Here's an introduction to this amazing tool and how to use it.


Conclusion

A well-thought-out pedal setup is a cornerstone of a guitarist’s sound. Whether you’re a beginner or a seasoned pro, understanding the basics of pedal arrangement, the benefits of a pedalboard, and how to choose the right gear will help you unlock your full potential.

Remember, the journey to finding your signature tone is as rewarding as the destination. So, take your time, experiment, and let your creativity shine. Whether you're chasing shimmering clean tones, crushing distortion, or atmospheric soundscapes, the right pedals can bring your vision to life.


For a quick "take-along" download the FREE pedalboard setup guide here!


History In The Making

In my recent podcast episode, I talked about forward motion and the idea that a ton of what sets us back in the studio is mindset. Today, I want to expound on that a little deeper by giving you a mindset shift that has helped me tremendously! That being that as a musician, a singer/songwriter, a mixing engineer, etc you are doing more than just making music or JUST mixing someones music. Instead think of it this way, "I am making history"!

Yep, that's right, when we set out to do this monumental task of making an artistic imprint on the society around us we are doing more than just spinning our wheels, we are making history. Think about it, we are releasing something that has never been heard before. If it has never been heard before that means that in the minds of the world it doesn't exist and therefore when we do release it for the world to hear for the first time, it becomes a part of history. This simple mindset shift has helped me to keep trudging along in the trenches at times with a song I felt less than enthusiastic about. It has helped me to release more music than ever before, even if I wasn't completely happy with where the song was in its less than perfect state. This mindset has helped me to navigate through the pitfalls and woes of tweaking that guitar delay for an hour and also helped me to see the forest for the trees on a mix that was not my own.

I know it sounds simple, but hey that's why this blog is called Home Studio Simplified! I want you to make music, better music, and more of it. Music should not seem like a job, even if it is our primary source of income. Nor should it be a daunting task that we put off for weeks because of the fear and frustration of what may appear to us as failure.

The next time you set down to work on something, think to yourself, "Today, I am going to make history".


Creating A Song: Step By Step

If there was one thing I really desired when I started to record and mix my own music, it was a clear cut, over the shoulder tutorial. I needed someone with more experience than I had to set me down and say, "Here is how you get started."

Unfortunately, I never had that. Though there are a ton of online tutorials, none of them seemed to cover just the basics, or how to get started in all of this. Since then there have been some who seen the need and stepped up to the plate to offer some help. I simply had to figure it out as I went and make a ton of mistakes.

That's why I decided to start a series of videos where I go through the entire process, step by step. It is that over the shoulder, "Here's how you get started" video series that I was looking for when I started out. Now you can follow along with me as I go through the whole thing! The best part is, I am not doing a ton of editing or working ahead. Why, is that important? Because it will allow you to see my mistakes. Yep, I said that. Then I will show you how I fix some of those mistakes! Priceless!

All to often (especially with social media) we catch only a glimpse of the beautiful editors rendition of something. This at times leaves us thinking that we need to be perfect. Although perfection is a good thing to strive for, and as a perfectionist I am guilty, we can over do it at times. The best concert I ever went to was a Casting Crowns concert. The reason why it was so good was because it was raw and unedited. They messed up a few times, but just kept right on going. The best training I have received on my job was at those moments when everything went wrong and chaos was running a muck. Thence trainer stepped in and showed how to fix it. Now, had that never happened, I would have been lost if the same situation cropped up without a trainer and without the experience. So, when I run into a problem with the mix we are working on, I am not gonna fix it in pre and then present it in post as a perfectly polished peice of work. Instead, I am going to point out the mistake and walk you through how I am going to attempt to fix it. A boss will tell you how to do something, a salesman will show you the finished product while carefully leaving out important flaws in that product. A leader, and a friend, will walk you through the whole process so that your aware of all the ins and outs, and show you how to do something.

That's what I am wanting to achieve in this video series. I want to genuinely help with a real world approach. Will the song be perfect? Nope? Will this series make you better? It may help you grasp some concepts to help you get there, but ultimately doing more recording, mixing, writing, etc., is what will make you better.

So head on over to YouTube and follow along with me as we go through the "Creating A Song: Step By Step" series.


Make sure you subscribe to stay up to date on all the latest videos I will be posting.

Physics of Equality-Production Elements

Wow! It's been crazy busy around here lately! Family Christmas before Christmas, shopping, Black Friday, and on top of that the typical Studio work. (Recording, Mixing, Mastering, drinking lots of coffee...)

So, I recently had the privilege of Recording Singer-Songwriter Justin Clark. Justin has been a long time friend from way back in my High School days and at that time he was just starting out on the guitar. In fact, he conveyed to me that I was the first person to show him a chord! Well, fast forward to now and man alive! This guy is good! After we reunited through a concert I was having at a local coffee shop, we got to talking about music and "geeking out" on acoustic guitars. One thing led to another and I was recording him here in my home studio. Needless to say it has been a blast!

We have discussed already that we are going to work through an EP for him to release in early February. (that's my goal) I thought I would document my progress each step of the way and so here is my first installment. In the video below I cover some of the production elements that I added to what was originally intended to be a sparse arrangement. The first thing he wanted was to just get a song recorded. He was expecting a simple acoustic guitar track and a vocal over top of that. However, after discussing different options, and showing him what could be done with the song by adding a few elements to it on the production side of things, he jumped in feet first with a full production.


BOSS BR-800 Control Surface Set-Up

Setting up the Br-800 to work as a Control Surface is actually quite easy. So, why would anyone want to do such a thing? Well, as I near the end of a mix one of my favorite final embellishments that breaths life as well as energy into a mix is Automation. For those of who you related with that, you probably also know then that using a mouse to perform this task is daunting to say the least. It is less musical, it is less creative, it is less... well cool.

In fact, it has helped my mixes in the present to set up my Br-800 in Control Surface mode and just close my eyes with the faders resting under my fingers. We mix with our ears, not our eyes, and so this takes away that urge to "see" the mix get better. Not to mention, when the wife walks in you look really into it and seem (to the untrained eye) to be working really hard. Unfortunately, my wife knows that I am having fun rather than me fooling her into believing that I am "in the throws" of a complex situation. She usually just chuckles and walks away.

Now, if you are not doing Automation, you need to. If you are waiting on buying a Control Surface first, don't. I used a mouse for years and it works just fine, its just more work. Also as stated previous;y, it's just not as cool. Anywho, I was asked to create a video showing how to set the Br-800 up for this wonderful feature and so without further adieu.


Using Aux Tracks

Many more possibilities open up when you explore the world of buses, aux tracks and sends — and
we'll do that right now, starting with a classic mix technique.

Here's a little scenario. You've got 20 audio tracks, and they all need reverb in differing amounts. Surely it's just a question of instantiating a reverb plug‑in on each? Well, it's not out of the question, but it'd be a terribly cumbersome way of working. First of all, the CPU hit of 20 reverbs could be colossal — potentially crippling if your computer is already maxed out. Second, configuring all those reverbs is very labour intensive, with way too much room for confusion. What's needed is a way to share one reverb flexibly amongst those 20 tracks — and it's easy. We're going to set it up on an aux track, a track type that you can't record on (although it can still be automated) and whose purpose in life is as a routing tool. Next, we'll configure the specialised extra outputs on the audio tracks — their aux sends — to split off some signal from each, destined for the reverb. Then you can tie the whole lot together with a bus. 


A technique that comes up frequently in SOS's interviews with great producers and engineers is parallel compression. Often used to supercharge drum overheads, in essence it's all about splitting the track's signal in two, applying aggressive compression to one 'half', leaving the other alone, and blending to taste. Parallel compression can create seriously dynamic‑sounding drum tracks. Most compressors won't have a wet/dry mix control, but if yours does, set it to 100 percent wet. Signal now begins to flow through the aux track, and its compressor, in parallel with the dry track — hence the name of the technique. One extra thing to think about here is whether the aux send is operating post‑fader or pre‑fader. What's the difference? Well, if it's post‑fader (which it'll be by default), as you adjust the drum track's main level fader, the send level changes too. If it's pre‑fader (which it will become if you click the send's little button), the send level is completely independent from the track's level fader. For parallel compression, I like to work pre‑fader, as then I can adjust the relative levels of the dry and compressed drums on their main faders with no fear of unpredictable level interactions as the mix takes shape. 

Recently, the Sonar family released the Jamaican Plain update which allowed the use of Aux tracks and Patch Points within the main track window. This has been a major upgrade to my effeiciency. Below is a video where I use some of those features similar to the areas SOS covered up top.


Save Time and Recall Settings

Total Recall


In the digital world we have it pretty easy, when it comes to recalling settings. Nearly every plug-in on the planet has the ability to save settings and templates are also save-able in most DAW's. Yet, even with these powerful tools we will not take full advantage of their potential in our Home Studios.

Time To Save Time


One thing we as Home Studio hobbyists struggle the most with is time. Finding time to record, finding time to mix, finding time to find the time to do so. Well, when you have a good set of presets and a healthy array of templates, you can essentially win back some of that time. How creative is it to label tracks, then color code them, then place icons next to them to further identify, on and on the viscous cycle goes? However, if you predominantly record just yourself singing and playing the guitar, make a template from your last session! If you find you always reach for the same plug-ins come mixing time, put them in that template with good starting point settings. Then, every time that creativity starts to flow the, its not held back by the dam of technicality.

You Can't Save Some Things, Or Can You


While it is a fact that some things simply can't be saved, there is another way around this as well. For instance, in the video included below, I painstakingly worked with my DAW to get buffer settings that would not interfere with my screen recorder, It took quite a bit of my precious time! Well, once I got those settings dialed in, and knowing that I would have to change them later, I took a screenshot of the settings. Then after labeling the pic accordingly I can now go back to those settings anytime now! This can be done with anything on your screen! So if you got that Bass EQ sounding good and want to send that to a friend, make a screenshot of your page and send it to them. Or maybe, you got an error you're not sure of in your DAW, screenshots can help show the support team from that company exactly what you're going through.

For Those Who Don't Know


Every keyboard has this feature, you may have to search for it if you're not aware of it. Simply press the “Print Screen” button and open up your paint program or even a Word document and paste into it. Either CTRL+V or right clicking on the mouse and selecting paste will get you there. 


Let Your Mix Be Heard

Mixing is very much a mental ascent. There are elements that require a very precise touch, backed by head knowledge and experience. However, there are areas that necessitate a more "blind" approach. This is what I want to cover today.

Now, when I deliver this there will be many who bulk at it and many who never actually put it into practice. Why? Because it seems so simple. DON'T be one of those who obtains loads of tips, tricks, and head knowledge but never experiments or applies. 

Ok, so enough preface. What's the hack?! Here it is...

Close your eyes.

Yep, I know revelatory, huh? But don't just brush this aside. How many times have you went to adjust something in your DAW and "heard" an audible difference only to realize that that knob you were tweaking wasn't moving at all! (Guilty!)

We are so visual. We want to see results. Yet, mixing is not based off of sight, it is sound we're after. Therefore by eliminating our body's natural inhibition to "see" results we are giving ear to what the craft is calling for, audible results.


Action Step:

If you have a Surface Controller this will be easier to do but if not it is still easily achieved by using your mouse or track pad. 

1) Pull up a track in your mix and solo it. 
2) Now, open up that "go to" EQ you love.
3) Remove any settings that may be on it. If you like how it sounds then write down those settings before clearing it out. If it has no settings then make some quick adjustments from your gut. Write them down and clear it out.
4) Pick a band and cut it by -3dbs with a moderate Q (1.5-3.0)
5) Now grab a knob on your Surface Controller or click and hold that same thing with your mouse and close your eyes.
6) Sweep around the frequency spectrum without opening your eyes. 7) Listen critically to the track and hear where that cut makes the most effective difference to get closer to the sound you're after.

Note: If you wrote down your settings from the previous adjustments, look at where your setting ended up and see if it matches your previous one. Which one sounds better? What did you discover!?

Save Time with MIDI

MIDI Recording

Recording, although fun, we still want to speed things up a bit and get something released! This MIDI tip will help you do just that! I recently laid down a track for a song I am arranging and thought mixing would be easier if I could get all my takes from various MIDI sounds at once. Then I thought, arrangement  would go smoother as well if I had all those sounds at my disposal right out of the gate. Audio engineers tend to over-complicate things. So, as an experiment, I thought I would just route all of my sounds to the same controller and play the exact same part at the same time. After it was all said and done I had every sound I wanted at my finger tips. played the exact same way, and setting right in front of me! That was easy! Now I know that this isn't revelatory to some of you , but anything that saves time now days is worth mentioning. I hope this helps. Watch the video below for a visual on this. Oh, and don't forget to subscribe. I am now uploading a new video every Saturday!


Mix Tips-Improving Workflow

In the video below I share with you some ways you can speed up your workflow and make your sessions more efficient. Some tips shared are Sonar specific, however, the concepts can be applied across any platform.


Mixing for Stereo Width

Mixing involves so much more than just moving faders around. It encompasses a whole skill set that has to be fine tuned and honed over years of practice. One prevailing question that I get is , "How do I get my mix to sound wide and full?" Well, as stated above, there are a lot of factors that go into creating stereo image. I am going to cover some of the basics first, and then we will dive a little deeper.

Wide vs. Full

When someone asks me that question I have to correct them in their presumption that both attributes (Wide and full) are one in the same. Although both contribute to one another, when someone asks this question they need to know that they are speaking of two different textures in a mix. For instance, a guitar can sound full and not sound wide, and vice versa.
Just like most everything else in mixing, a "full" sound can be subjective to the listener. However, anyone can spot a wide sound in the right listening environment. To me a "full" sound is a natural sound. It is more a feeling that comes from the instrument that places you in the same room with it, as if it were right in front of you. Whereas, a wide sound, places the instrument all around you and envelops you. So, now that I have set that straight, we can move on to ways we can achieve stereo width.

True Stereo vs. Stereo Shams


When I first started mixing, I thought that simply cloning a track and panning them hard right and left, would give me stereo sound. I soon found that there is no stereo width achieved by doing that. Essentially, all you are doing is creating a louder Mono track that now takes up more real estate on both ears, and your ears cannot decipher the difference between a single Mono track and a double of the same.

The best way to get true stereo sound is to record the same part twice, on two separate tracks, and then pan them out. The small inconsistencies in your playing will add up to  huge sound that your ears can decipher now as two different parts. You can use the same source, and the same settings if you'd like, although it may add more depth to add or remove elements from the second track.

Another way to get decent stereo results is by utilizing different mics and mic placements. There are a ton of ways to set up two microphones to record in stereo. One of my favorites right now is "Mid-Side Recording". In the video below I will cover that in further detail.

Then there are the shams... These are stereo widening plug-ins, delay plug-ins, and others that emulate width. Although you can get some usable results from these in certain situations, if you want real width you can feel, then you need to take a little extra time to layer another track or record in stereo. In the video below I will give you an example of both true stereo and stereo emulation. Don't forget to subscribe to the channel while you 're there.


A Faster Fretboard

As a guitarist there is nothing more amazing than picking up a guitar that has been well maintained, set up properly, and has a fast fret-board. If you haven't heard the terminology "Fast Fret-board"... I made it up. No, just kidding, someone else did.

Basically, it is a term that means a fret-board that isn't impeded by dirt or grime, it has smooth frets that are free of nicks and dings, and due to it's set up allows one to play well without other things getting in the way. (Or slowing you down)

In this video I give a quick tip on how to speed up your fret-board and some basic maintenance of the same. I hope you enjoy! Oh, and if you decide you'd like the Dunlop 6500 System 65 Guitar Maintenance Kit that I mention in this video (HIGHLY RECOMMENDED) Then use the link I just provided to help a brother out at no extra cost to you. It's like Amazon leaving me a little change in the tip jar for sending some business their way. God Bless!


A Guitar's Best Friend: Humidity


Have you ever wondered why your guitar plays great one day, yet feels completely different on another? Suddenly the fret edges are sharp or the action has shifted and the guitar won’t play in tune anymore. These changes can happen overnight, especially in the winter. Cold, dry weather brings low humidity and that causes cracked guitars. Winter is my busiest time of year for structural repairs, and most of these repairs are preventable with an inexpensive humidifier. I’ve been preaching this message for more than two decades: Preventive measures are the key to keeping your guitar in top condition.

Dealing with humidity.
Humidity is the amount of moisture or water vapor in the air. The more moisture in the air, the higher the humidity. Lesser amounts of moisture results in lower humidity.
There’s a popular myth that a guitar sounds better when it dries out. Actually, it just cracks and then I get to charge a fortune to repair it. This myth is often confused with a guitar’s natural aging process. When a guitar ages, cells in its wood begin to crystallize and harden, causing the guitar to get louder and more dynamic. But if it’s not properly humidified, the wood will crack. (Did I mention structural repairs are very expensive?)
But you can have too much of a good thing: When a guitar is over humidified, it swells up and loses volume and tone. (Think of a tub of lard with strings.) High humidity can also cause finish discoloration and even allow mold to grow inside the guitar.
The way to avoid these problems is to maintain a consistent humidity level for your instrument—particularly an acoustic hollowbody. This will prevent a host of ailments and costly repairs.

Symptoms of low humidity.
One of the common telltale signs of a dry guitar is sharp fret ends. When a guitar dries out, the fretboard shrinks and the frets protrude beyond the wood. Correcting this problem requires re-humidification, conditioning, and fret filing. If your guitar is showing signs of low humidity (sharp fret ends, cracks, or separated glue joints), you need to have it evaluated by a reputable luthier.
This is what happens to a dry guitar in various levels of low humidity.

LEFT: Fig. 1. This top cracked from lack of humidity. MIDDLE: Fig. 2. Fretboards can also crack as a result of low humidity. RIGHT: Fig. 3. The Humidipak guitar humidifier system. Photo courtesy of Planet Waves
Below 35 percent humidity:
• Action (string height) changes.
• The top flattens out.
• Fret ends feel a little sharp.
Below 25 percent humidity:
• Fret ends become very sharp.
• There are drastic changes in the playability.
• Seams begin to separate.
• There’s a slight separation between the bridge and top.
• The finish starts to sink.
Below 15 percent humidity:
• Cracks appear in the top and body (Fig. 1).
• The bridge and fretboard crack (Fig. 2).
• The glue joints in the neck, bridge, and braces begin to separate.
All of these ailments will greatly lower the value of the instrument—not to mention your enjoyment of playing it—so be sure to maintain your guitar at the proper humidity level.
What is the best humidity level for my guitar?
Most experts say 40-50 percent. At this level, a guitar will sound and play its best. A great way to control humidity is to use a humidifier. Think of it as an inexpensive insurance policy to protect you from very expensive repairs.
A guitar humidifier is easy to use and very effective. Some guitar humidifiers are suspended between the 3rd and 4th strings and contain a damp sponge that needs remoistened every two or three days. This type of product works okay, but it’s not consistent. The humidity will spike at first, then slowly diminish as the sponge dries out.
The more modern guitar humidifiers use a gel that not only emits humidity, but also absorbs it if the humidity gets too high. This technology was first developed for cigar humidors, and now it’s available for guitars. Planet Waves makes a great humidity control system called the Humidipak that uses this technology. I’d also recommend using a hygrometer to measure the humidity.

LEFT: Fig. 4. A room humidifier in action. MIDDLE: Fig. 5. Thanks to heat exposure, this bridge separated from the top leaving a gap big enough to slide in a seam separation knife blade. RIGHT: Fig. 6. Use a wood conditioner to protect your rosewood or ebony fretboard.
Another great way to control humidity is to use a room humidifier. This is a great idea if you have multiple guitars in one room. Humidifiers come in all shapes and sizes, but be very selective, as some work much better than others. I use a programmable humidifier that utilizes both “warm mist” and “ultrasonic technology.” It also has a built-in hygrometer and a UV light to help purify the water. This type of humidifier is much healthier than the “cool mist” types that require a filter.
What guitars need to be humidified?
All guitars should be humidified, even electric solidbodies. Newer guitars generally need more moisture because the wood is kiln-dried, as opposed to a vintage guitar made from air-dried wood. The difference between kiln and air-dried wood is dramatic. Kiln-dried wood uses heat to dry the wood to accelerate the aging process. However, these guitars require more moisture to prevent warping and cracking. Air-dried wood is more stable, especially in vintage guitars, because the wood was generally aged over a decade before being made into a guitar. As a result, the cracked wood was removed from the pile and used for something else. Guitars made from air-dried wood still need humidity to sound best, but they retain moisture better than their modern counterparts.

Too hot to handle!
Heat exposure can also have destructive effects on a guitar. When a guitar is left in the trunk of a car—especially on a sunny day—the glue joints can fail. Imagine the shock of opening your case and finding a pile of wood where your guitar used to be. Once again, I get to charge a fortune for repairing heat-damaged guitars, so be vigilant.

A frigid nightmare.
Cold is also an enemy. When a guitar is exposed to low temperatures and then brought into a warm environment, the finish can develop checking. Checking creates tiny hairline cracks in the finish—like someone laid a spider web over the finish— and you can’t polish this out. Finish checking is permanent and can only be repaired by refinishing (not something I would recommend). Finish checking is basically the result of the finish changing from one temperature extreme to the other. This causes the finish to expand and contract too fast, and that makes it crack. To minimize this, when you bring your guitar in from the cold, don’t open the case until the outside of the case is at room temperature. Even then, there’s no guarantee the finish won’t check, but it will lessen the odds.
Okay, let’s review—here’s how to prevent damage to your beloved guitar:
• Buy a guitar humidifier.
• Keep your guitar at between 40–50 percent humidity.
• Use a hygrometer.
• Keep your guitar in a consistent environment (one that’s comfortable for you).
• Keep it out of direct sunlight and out of the car trunk.
These simple steps can save you hundreds of dollars in repairs.

Adapted from: http://www.premierguitar.com/articles/Fighting_the_Humidity_Battle

John Levan Nashville guitar tech, has written five guitar repair books, all published by Mel Bay. His bestseller, Guitar Care, Setup & Maintenance, is a detailed guide with a forward by Bob Taylor. LeVan welcomes questions about his PG column or books. Drop an email to guitarservices@ aol.com or visit guitarservices.com for more info on his guitar repair workshops..

A Better Mix: Simple Steps (Part 2)

In the previous post I included a video about the process and the concepts I used to dramatically improve my mix on the song "Livin' For The Moment". In the video attached to this post I go step by step explaining the concepts. I hope you enjoy this sort of over the shoulder approach. To hear the podcast associated with this post click here. http://bit.ly/HSS_Podcast

A Better Mix: Simple Steps

After my latest album release I made some resolutions. There have been some things that I have always done just to "get by" and make some music. Well, I realize that I was wrong about a lot of those methods. (Yep, I just said I was wrong)

So I decided if I was going to step it up and get more serious about making better music/better mixes that I had to break away from the norm. This means I would have to work harder, but I have to say, it was worth it! This latest song nearly mixed itself and the truth is, I had more fun with it! Though these things are commonly known, I am reiterating there importance to making better mixes. For the most part I have utilized these in most of mixes, but going forward, I will be takin the time to implement these methods on EVERY mix, EVERY time!

So, check out this video, and let me know if you have any other tips for the community. God Bless!


Following My Own Advice

So recently in the podcast I gave a list of things that I would be doing different in the future when recording or putting an album together. Well, I have been following my own advice. Now though it was respective to things I needed to improve, the advice itself was not solely mine. I have been learning a lot lately and have already put into place several things that are helping, things that I would've overlooked or thought not to be important had someone else not taught me the importance.

So today I share a short list with you of things that are important when it comes to recording, mixing, or just plain studio related work.

• Work on gettin a sound that when recorded will NOT need much done to it in the mix from whatever source you are recording

• Use not only your ears but your resovoir of knowledge to know what a particular source should sound like and go with it

• Record more than one take even if you thought the last one just nailed it

• Make your gear work for you, not against you (
ie; use your gears low pass/high pass filters, impedance controls, etc. to shape the sound to what you want in the way in)

• Don't worry about the length of time it take to get a great sound, it will pay off later

• Record at lower levels -18 to -12 at the highest (if recording 24 bit, not much hotter if you're at 16 bit though)

• Edit, Edit, Edit

Already these few simple steps are improving my latest recording, I will be sharing some other things here soon on the YouTube channel. Stay tuned, subscribe, and share!


Mobile Mix Reference

If you are anything like me, (I will pray for you if you are) then you probably take your mixes with you due to time constraints. You wanna hear it in the car, you wanna check it on that Bluetooth stereo your buddy has, and so you put the printed mix (your latest revision) on your mobile device and take it with you.

I use my iPhone a lot! I even utilize the features that it has installed to help me make educated decisions when I get back to the studio. Let me explain that last statement in detail. There are features in the iPhone that aren't so well known that can help you out as a mixing engineer.

The first is the mono setting for your music. If you were unable to check for phase or proper EQ adjustments before you left, or maybe even forgot, this setting can really help out. However, it is kind of hidden in all the various menus, menus that most will never even go through. To utilize this setting as a mixing reference tool follow the instructions below

1) Click on the Settings button


2) Next click on the General option


3) Now click on the Accessibility menu
4) Scroll to the bottom now and you will see the Mono option


I recently just used this on a mix that I was in a hurry to get on the phone. I had not checked the phase, or even to mix itself in mono as of yet and was still in the "rough draft". I could hear the guitars in the headphones, but in the car they were gone. So I switched my phone to Mono and the guitars disappeared in the headphones! Immediately I knew the Phase was out on the guitars. Pretty cool that I was able to make that finding while at work and away from the mixing desk.

The next menu is a little more accessible and isn't as buried in a maze of other menus. I was surprised however by the number of people that did not know this menu existed. I am speaking of the EQ menu found under the Music app. To find that menu follow the instructions below.

 
1) Click on the Settings button


2) Scroll down to the Music menu
3) Scroll down to the bottom to find the EQ menu

4) Choose from a wide variety of EQ options

Ok, so now that we have found the EQ menu, we can use this to gain insight as to where our mix may be lacking or overdone. For instance, if you can only handle the Bass in your mix on the Bass Reducer setting, chances are you need to make some adjustments to your low end. Now, all this is subjective to the headphones you may be listening on as well.

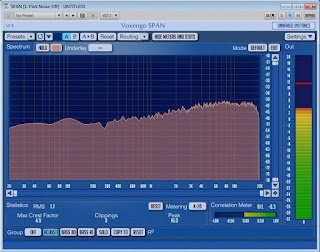
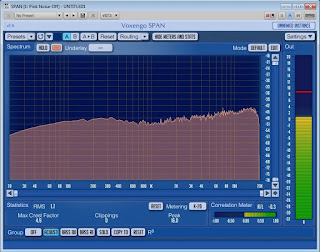
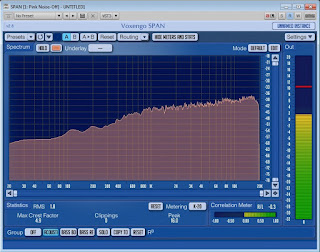
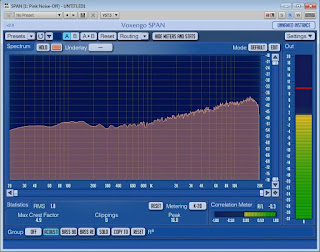
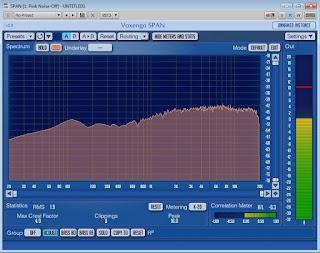
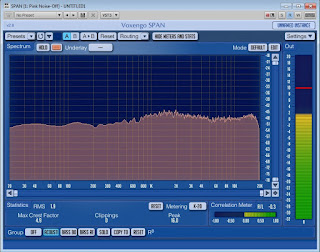
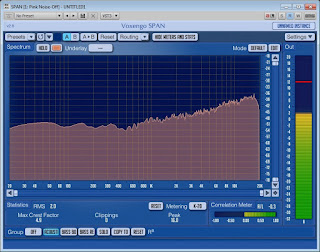
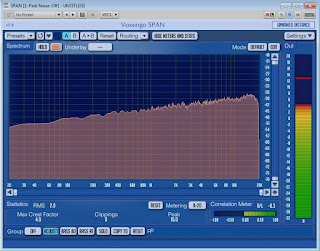
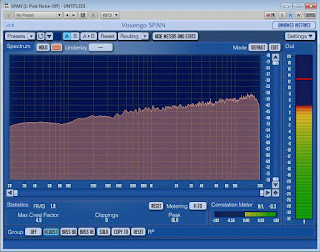
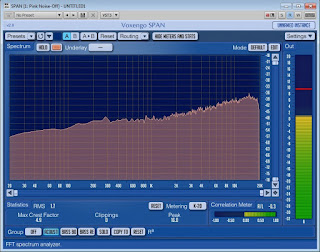
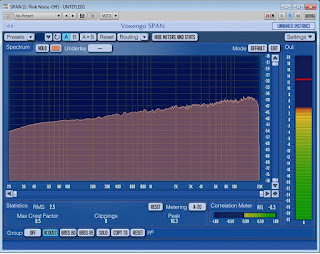
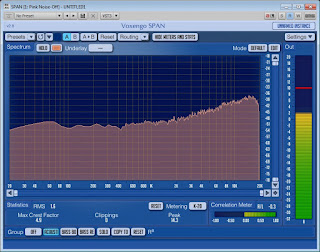
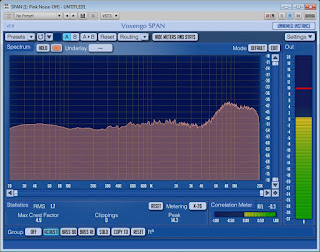
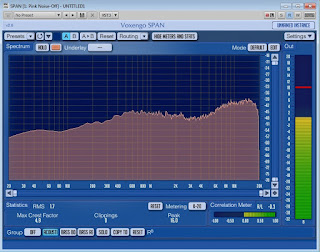
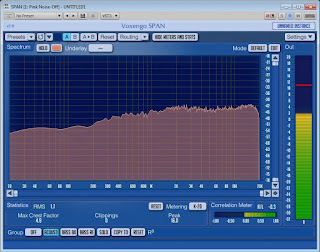
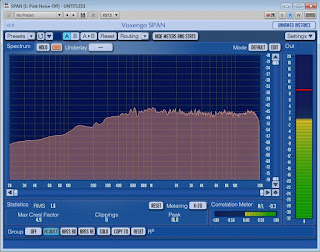
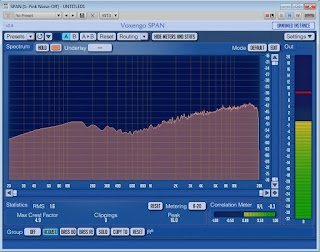
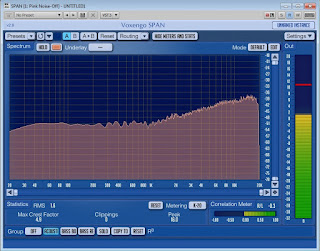
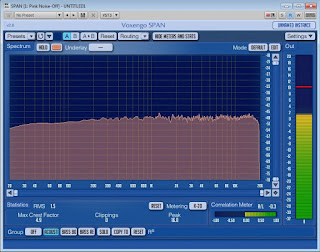
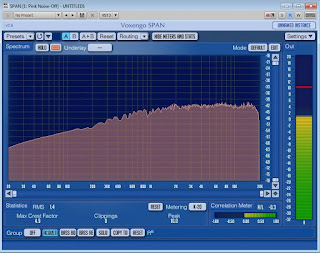
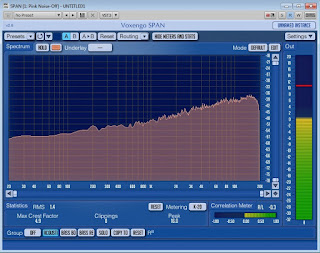
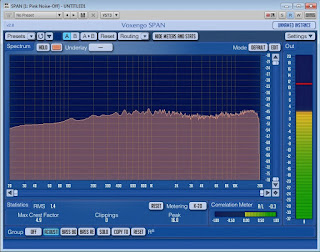
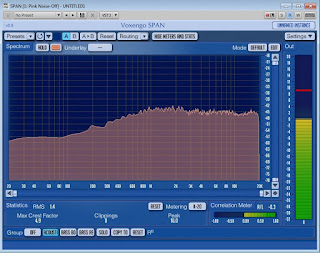
I did a lot of research and even went as far as to get on the Apple website to find what exactly the EQ settings change in the frequency ranges. After a tiring search I turned up nothing. So, in the spirit of my Scottish heritage, I improvised. I downloaded a pink noise signal which is one of the flattest sound profiles you can get. I played it through my iPhone while the headphone jack was plugged into the microphone jack on my PC. Then I put the SPAN plug in on a track and therefore was able to view the EQ changes that were taking place by changing the settings in the iPhone. Below you will find screenshots of the various settings with labels to attribute. This information is no where else! 

Acoustic Setting
Bass Booster Setting


Bass Reducer Setting
Classical Setting
Dance Setting
Deep Setting
Electronic Setting
Flat Setting
Hip-Hop Setting
Jazz Setting
Late Night Setting
Latin Setting
Loudness Setting
Lounge Setting
Piano Setting
Pop Setting
R & B Setting
Rock Setting
Small Speakers Setting
Spoken Word Setting
Treble Booster Setting
Treble Reducer Setting
Vocal Booster Setting
Now, one thing to remember is that your car already has an EQ in place, so you need to set your EQ on your iPhone to off before listening in the car, otherwise it will sound all jacked up. I hope this was helpful, if nothing else it is at least interesting. If you would like a copy of the jpegs associated with the EQ settings (the same ones found above) you can download it here.